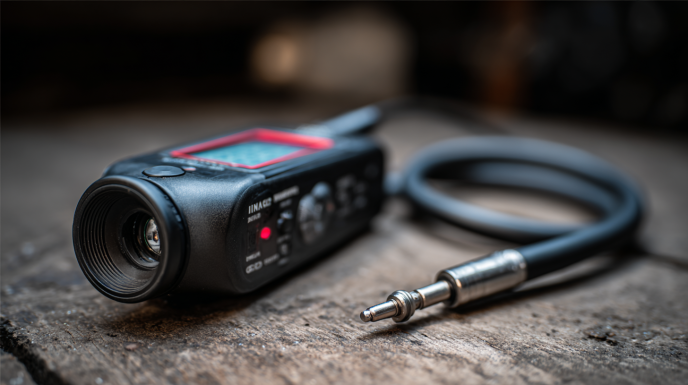

CEN-TECH Digital Inspection Camera
- 2.4 in. sharp resolution screen and digital borescope for superior image clarity (320 x 240 pixels)
- Small 8-1/2mm waterproof camera (fits most spark plug holes)
- 38 in. long flexible camera cable
- View images on external monitor with video-out cable
- Runs on 4 AA batteries (sold separately)
$79.99
As someone who’s spent countless hours contorting my body into impossible positions just to get a glimpse of what’s behind a wall or deep inside an engine, discovering the Cen Tech Inspection Camera felt like finding a superpower. No more dislocating my shoulder to peek behind the refrigerator or squinting hopelessly into dark drainage pipes. This nifty device has completely transformed how I approach both professional projects and weekend DIY adventures.
Today, I’m sharing everything I’ve learned about this game-changing tool—from its capabilities and operation to maintenance tips and real-world applications. Whether you’re a professional tradesperson or a curious homeowner, this comprehensive guide will help you understand if the Cen Tech Inspection Camera is the solution you’ve been searching for.
What Exactly Is a Cen Tech Inspection Camera?
The first time my buddy Steve brought over his inspection camera to help locate a mysterious leak in my basement, I was skeptical. But watching him slide that thin, flexible cable into a tiny access point and suddenly reveal the culprit on the bright LCD screen—a hairline crack in a pipe that would have taken hours to find otherwise—I was instantly converted.
A Cen Tech Inspection Camera is essentially your eyes where your body can’t go. Think of it as a modern, technological periscope designed for the digital age. At its core, it’s a handheld device featuring a long, flexible cable with a tiny camera and light source at the end. This design allows you to snake the camera into tight, dark, or otherwise inaccessible spaces and view real-time footage on the attached display screen.
The beauty of this tool lies in its simplicity and effectiveness. Whether you’re trying to find a lost wedding ring in a drain, inspect inside an engine component, check behind walls for pests or moisture damage, or even look inside a nest without disturbing the inhabitants, the inspection camera offers non-destructive visual access to spaces that would otherwise remain mysteries—or require significant demolition to examine.
How This Technological Marvel Actually Works
The operation principle of the Cen Tech Inspection Camera is brilliantly straightforward yet ingenious. The system consists of three main components working in perfect harmony:
- The Camera Head: Located at the tip of the flexible cable, this miniature camera captures video footage of whatever it encounters. It’s equipped with LED lights to illuminate dark spaces, ensuring you get a clear view regardless of ambient lighting conditions.
- The Flexible Cable: This semi-rigid, goose-neck style cable allows you to maneuver the camera head through twists and turns while maintaining enough stiffness to be guided purposefully. It’s the perfect balance between flexibility and control.
- The Display Unit: This handheld component houses the screen, controls, battery, and in some models, recording capabilities. It’s where you view the real-time footage and adjust settings like brightness, contrast, and LED intensity.
When powered on, the camera captures images and transmits them instantly to the display unit through wires embedded within the cable. What makes this technology particularly remarkable is how it packs such sophisticated functionality into a relatively affordable and user-friendly package.
The first time I used mine to inspect my home’s air ducts, I was amazed by how intuitive the whole system felt. Within minutes, I was navigating corners and identifying build-up that had been affecting our air quality for months—all without cutting a single access hole in our ductwork.
Getting Hands-On: Using the Cen Tech Inspection Camera
Using this tool effectively does involve a slight learning curve, but nothing a curious mind can’t master in a single afternoon. Here’s my step-by-step approach for those new to inspection cameras:
Initial Setup
- Charge Fully Before First Use: The Cen Tech camera typically comes partially charged, but I recommend giving it a full charge before your first adventure. Connect the included USB cable to the charging port on the display unit and plug it into a standard USB power source. A full charge usually takes about 3-4 hours, indicated by a solid (rather than flashing) light on the unit.
- Familiarize Yourself With Controls: Before diving into a real project, spend a few minutes exploring the device’s buttons and menu options. The power button is obvious, but take time to understand the brightness controls, image rotation feature, and if your model includes it, the recording function.
- Practice Cable Manipulation: The flexible cable has a specific feel that takes practice to master. Try guiding it through a simple maze (like chair legs) in open space before tackling enclosed areas. This helps develop intuition for how much pressure is needed to turn corners without kinking the cable.
Practical Application
When I first inspected my kitchen sink drain, I learned several valuable lessons that I’ll share with you:
- Plan Your Route: Before inserting the camera, visualize the path it needs to take. For my drain inspection, I sketched a quick diagram of the expected pipe configuration so I knew approximately when to expect turns.
- Start With LED Brightness at Medium: Too much light can create glare in reflective surfaces (like wet pipes), while too little leaves you squinting at shadows. Starting at medium gives you a baseline to adjust from.
- Move Slowly and Deliberately: Rushed movements often result in blurry footage and missed details. I pace my cable advancement at about 1-2 inches per second, which provides comprehensive visual coverage without missing crucial details.
- Use Rotation as Needed: Most models include an image rotation function, which is invaluable when navigating complex pathways. As the camera twists through spaces, being able to reorient the image keeps you from developing a serious crick in your neck!
- Document Key Findings: If your model allows recording or image capture, use this feature liberally. In complex inspections, you might want to review findings later or share them with professionals if you discover issues requiring expert attention.
I’ll never forget using these techniques to finally locate a squirrel’s entry point into our attic. After months of mysterious scratching sounds, fifteen minutes with the inspection camera revealed a small gap in our soffit that would have been invisible from either inside or outside the house.
Technical Specifications: What Makes the Cen Tech Stand Out
Resolution and Image Quality
The Cen Tech Inspection Camera typically features a 640 x 480 resolution camera. While this might not sound impressive compared to today’s smartphones, it’s more than adequate for its intended purpose. The image clarity is sufficient to identify small cracks, foreign objects, corrosion, or other issues in pipes, machinery, or structural elements.
What I’ve found particularly useful is how well the camera performs in low-light conditions. The built-in LEDs provide just enough illumination without washing out the image, allowing for remarkable detail even in completely dark environments. When I was diagnosing an issue with my car’s fuel injector, I could clearly see the carbon deposits that were causing the problem—detail that would have been impossible to observe otherwise.
Recording Capabilities
Depending on the specific model, the Cen Tech camera may offer image capture and video recording functionality. My model includes a microSD card slot that supports cards up to 32GB, allowing for hours of video recording or hundreds of still images. This feature has proven invaluable for documenting issues before and after repairs, or for sharing findings with contractors or family members.
The recording interface is straightforward—a simple press of the record button starts and stops video capture, while another button takes snapshots. These files can then be transferred to a computer via the microSD card for permanent storage or sharing.
Cable Length and Flexibility
One of the most critical specifications of any inspection camera is its cable length. The Cen Tech typically comes with a 3-foot (36-inch) cable, though some models offer extensions up to 6 feet. This length has proven sufficient for most of my household applications—checking behind appliances, inspecting HVAC ducts near vents, and examining plumbing issues under sinks.
The cable diameter is approximately 8mm (about 5/16 inch), which allows it to navigate through most standard drain pipes and access points. The semi-rigid design strikes an excellent balance between flexibility and control—it’s pliable enough to bend around corners but stiff enough to be pushed through long passages without doubling back on itself.
I particularly appreciate how the cable maintains its position once placed. When inspecting my dishwasher’s water inlet valve, I was able to position the camera perfectly and then have both hands free to check the display and take notes without the cable shifting position.
Waterproof Rating
One feature that’s easy to overlook until you need it is waterproofing. The camera head and cable of the Cen Tech are waterproof (typically rated IP67), allowing for inspections in wet environments like plumbing systems. However, it’s important to note that the display unit itself is not waterproof and should be kept dry.
I learned this distinction the hard way during a particularly enthusiastic inspection of my garden irrigation system during a light rain. While the camera performed flawlessly underwater in the valve box, I had to be careful to keep the display unit sheltered. Since then, I’ve made it a habit to bring a small towel and plastic bag for the display unit when working in potentially wet conditions.
Connectivity Options
While the standard Cen Tech model operates as a self-contained unit with its own display, some users wonder about connectivity to external devices. The basic model doesn’t typically offer direct smartphone or computer connectivity, functioning instead as a standalone device.
However, for those needing to share or analyze findings more extensively, the recorded images and videos can be transferred to a computer via the microSD card. This two-step process has worked well enough for my needs, allowing me to include inspection footage in reports or emails when necessary.
Powering Up: Battery Life and Charging
The Cen Tech Inspection Camera runs on a rechargeable lithium-ion battery that provides approximately 4-6 hours of continuous use on a full charge. This has proven more than adequate for most of my inspection tasks, which typically take anywhere from 15 minutes to an hour.
Charging is straightforward via the included USB cable. A full charge from empty takes about 3-4 hours in my experience. What I particularly appreciate is the battery life indicator on the display, which gives plenty of warning before power runs low. This has saved me from the frustration of losing power midway through complex inspections.
A power-saving tip I’ve discovered: if you’re performing an extended inspection, turning down the LED brightness can significantly extend battery life without substantially impacting image quality in most scenarios.
Where to Purchase and What to Expect Price-Wise
The Cen Tech Inspection Camera is primarily available through Harbor Freight stores, both in physical locations and through their online store. Occasionally, you might find them through third-party sellers on platforms like Amazon or eBay, though I’d recommend caution with these sources to ensure you’re getting a genuine product with warranty coverage.
Price-wise, the Cen Tech offers exceptional value compared to professional-grade inspection cameras. At the time of writing, the standard model typically retails between $70-$90, with occasional sales bringing it down to around $60. This represents significant savings compared to professional models that can cost $300-$500 or more.
During Harbor Freight’s famous parking lot sales or with their ubiquitous coupon system, I’ve seen even better deals. I purchased mine during a holiday sale for just under $65, which has proven to be one of the best tool investments I’ve made in terms of utility per dollar spent.
Real User Experiences: What the Reviews Say
Before purchasing my own unit, I spent considerable time researching user reviews, and my subsequent experience has largely aligned with the consensus. Here’s the general sentiment among Cen Tech Inspection Camera users:
Positive Feedback
Most users praise the camera’s value proposition—providing functionality similar to much more expensive professional tools at a fraction of the cost. DIYers and homeowners are particularly enthusiastic about finally being able to diagnose issues that previously required professional service calls.
The image quality receives consistent praise for being clear enough for practical applications, even if it doesn’t match the resolution of higher-end models. Many reviewers specifically mention successful plumbing and automotive diagnostics that saved them significant money on professional services.
The battery life and ease of use are also commonly cited positives, with many users appreciating the intuitive interface that doesn’t require technical expertise to operate effectively.
Critical Feedback
The most common criticism involves the cable length, with some users wishing for longer options straight out of the box. While extensions are available, some users report that connecting multiple extensions can sometimes impact rigidity and control.
Some reviewers note that in extremely tight spaces, the cable can occasionally be too stiff to navigate very sharp turns. This is the inherent trade-off with semi-rigid cables—enough stiffness for pushing through passages means somewhat limited flexibility in very tight corners.
A small percentage of users report durability concerns, particularly regarding the connection between the cable and the display unit. Based on my own experience and research, treating this junction with care during use and storage seems to prevent most issues.
Troubleshooting Common Issues
Even the best tools occasionally present challenges. Here are solutions to the most common issues users encounter with the Cen Tech Inspection Camera:
Display Won’t Power On
- Check Charge Level: The most common cause is simply a depleted battery. Connect to power for at least 30 minutes before attempting to power on again.
- Reset the Unit: Look for a small reset button (often in a pinhole on the device). Using a paperclip to press this button can resolve software freezes.
- Check for Physical Damage: Examine the connection between the cable and display unit for signs of damage or loose connections.
Blurry or Poor Image Quality
- Clean the Lens: The tiny camera lens can accumulate dust or moisture. Gently clean it with a soft, slightly damp cloth and allow to dry completely.
- Adjust LED Brightness: Too much or too little light can affect image clarity. Experiment with different brightness settings for optimal results.
- Check for Condensation: When moving between environments with significant temperature differences, condensation can form on the lens. Allow time for this to dissipate before use.
Cable Maneuverability Problems
- Don’t Force It: If you feel resistance, never force the cable. Withdraw slightly and try a different angle of approach.
- Pre-Shape the Cable: For complex pathways, gently pre-bend the cable to approximate the expected route before insertion.
- Use Lubricant When Appropriate: For plumbing inspections, a small amount of dish soap and water can make insertion easier without damaging the camera.
My own troubleshooting adventure came when I noticed decreased image quality after a particularly dusty attic inspection. A gentle cleaning of the lens with a microfiber cloth restored the clarity completely, reminding me of the importance of proper maintenance.
Industry Applications: Beyond the Basic Home Inspection
While my personal use centers mostly around home maintenance and DIY projects, the Cen Tech Inspection Camera has applications across numerous professional fields:
Plumbing
Professional plumbers use inspection cameras to locate blockages, identify pipe damage, and verify successful repairs without excavation or disassembly. The waterproof design makes this one of the most natural applications for the tool.
When my neighbor’s basement repeatedly flooded despite multiple plumber visits, I loaned him my camera. He quickly identified tree roots invading a section of pipe that previous plumbers had missed, saving thousands in misguided repairs.
Automotive Repair
Mechanics can inspect engine components, transmission issues, and hard-to-reach areas without extensive disassembly. This saves significant labor time and helps pinpoint problems accurately.
My brother-in-law, a weekend car enthusiast, borrowed my camera to locate a mysterious rattle in his classic Mustang’s dashboard. Within minutes, he found a loose fastener that would have required hours of dashboard disassembly to locate by conventional means.
HVAC Service
Heating and cooling professionals use inspection cameras to examine ductwork for blockages, damage, or mold growth. The camera can travel significant distances through duct systems to identify issues requiring attention.
Home Inspection
Professional home inspectors increasingly carry inspection cameras to examine areas like attics, crawl spaces, chimneys, and drain systems more thoroughly without invasive measures.
Wildlife Management
Perhaps surprisingly, wildlife removal specialists use inspection cameras to locate nests or animal entry points in buildings without destructive searching. This allows for more precise and less invasive removal strategies.
The Warranty Question: What’s Covered and For How Long?
The Cen Tech Inspection Camera typically comes with a 90-day warranty when purchased new from Harbor Freight. This covers manufacturing defects but generally excludes damage from misuse or normal wear and tear.
In my experience, Harbor Freight’s customer service has been reasonable about warranty claims, though as with any warranty, documentation of your purchase is essential. I recommend keeping your receipt and registering the product if that option is available.
For peace of mind beyond the standard warranty, Harbor Freight often offers extended protection plans at the time of purchase. Given the moderate cost of the tool and its potential for saving much larger amounts through DIY diagnostics, this additional protection can be worth considering, especially if you plan to use the camera frequently or in challenging environments.
Caring for Your Investment: Maintenance Tips
To ensure your Cen Tech Inspection Camera provides years of reliable service, I’ve developed a maintenance routine that has kept mine performing like new:
After Each Use
- Gentle Cleaning: Wipe the camera head and cable with a soft, slightly damp cloth to remove any debris, moisture, or potential contaminants. Pay special attention to the lens area.
- Proper Coiling: When storing the cable, create large, loose coils rather than tight bends. This prevents stress on the internal wiring and helps the cable maintain its original flexibility.
- Check for Damage: Quickly inspect the cable for any signs of wear, kinks, or damage, particularly at connection points. Early identification of potential issues can prevent failures during critical use.
Monthly Maintenance
- Deep Clean: Once a month, I clean the entire unit more thoroughly, including the display screen and control buttons, using appropriate electronic cleaning products.
- Battery Conditioning: For optimal battery life, I fully discharge and recharge the unit monthly when it hasn’t seen frequent use. This helps maintain battery capacity over time.
- Software Updates: Some newer models may receive occasional firmware updates. Check the manufacturer’s website for any available updates that might improve functionality.
Seasonal Storage
If you plan to store the camera for extended periods, I recommend:
- Charge to 50%: For long-term battery health, store with approximately 50% charge rather than fully charged or depleted.
- Store in a Dry, Temperature-Controlled Environment: Extreme temperatures can affect battery life and electronic components, while moisture can cause corrosion.
- Use the Included Case: The protective case isn’t just for transportation—it provides excellent protection during storage as well.
Following these maintenance practices has kept my two-year-old camera functioning as well as the day I purchased it, despite numerous challenging inspection environments.
Accessories That Enhance Functionality
The basic Cen Tech package includes the essentials, but several accessories can significantly expand its capabilities:
What’s in the Box
The standard package typically includes:
- The display unit with built-in controls
- The camera-equipped flexible cable
- USB charging cable
- User manual
- Storage case
Worthwhile Additions
Based on my experience, these accessories provide the most value:
- Cable Extensions: Available separately, these add length to the standard cable for deeper inspections. I’ve found the official extensions maintain better rigidity than third-party options.
- Magnetic Attachment: This accessory attaches to the camera head and allows you to retrieve small metal objects from tight spaces—a feature I’ve used multiple times to recover dropped screws inside machinery.
- Hook and Mirror Attachments: These help manipulate small objects or view around corners in extremely tight spaces. The mirror attachment proved invaluable when inspecting the interior of my car’s exhaust system.
- High-Capacity MicroSD Card: If your model supports recording, investing in a larger, faster microSD card improves recording quality and capacity. I use a 32GB card that has never approached capacity even during extensive documentation projects.
- Protective Lens Covers: These inexpensive additions protect the camera lens during storage and transportation. After scratching my first camera lens, this became a non-negotiable accessory for me.
Practical Applications: Where I’ve Found Success
Over the past two years, my Cen Tech Inspection Camera has more than paid for itself through numerous successful applications. Here are some of the most valuable uses I’ve discovered:
Plumbing Diagnostics
The camera has helped me locate and identify:
- Hairline cracks in pipes
- Root intrusions in sewer lines
- Foreign object blockages
- Mineral build-up in water heater elements
One particularly satisfying win came when my kitchen sink developed a slow drain. Rather than immediately calling a plumber, I deployed the camera and discovered a small plastic toy my daughter had somehow managed to flush down the drain. A simple retrieval tool solved the problem in minutes, saving a $150 service call.
Automotive Inspection
As someone who enjoys working on my own vehicles when possible, the camera has revolutionized my diagnostic process. I’ve used it to:
- Inspect spark plug wells before removal
- Check for corrosion in battery compartments
- Examine exhaust systems for damage
- Look inside fuel tanks for contamination
The most significant automotive success came when diagnosing a mysterious check engine light in my truck. The camera allowed me to spot a cracked vacuum line hidden behind the intake manifold—a five-minute fix once identified, but potentially hours of disassembly without visual confirmation.
Home Maintenance
Around the house, the camera has proven invaluable for:
- Inspecting chimney flues for blockages
- Checking gutter downspouts for clogs
- Examining wall cavities for insulation issues or pest activity
- Looking behind appliances without moving them
Last winter, we noticed a cold draft in our living room despite having new windows. Using the camera through a small existing opening in the baseboard, I discovered a section where insulation had completely collapsed within the wall cavity. Targeted foam insulation injection solved the problem without removing drywall.
Wildlife Management
In an unexpected application, the camera helped:
- Locate a bird’s nest in our dryer vent without disturbing it
- Confirm that squirrels had vacated our attic before sealing entry points
- Check inside a hollow tree in our yard before removal to ensure no creatures were nesting inside
Is the Cen Tech Inspection Camera Right for You?
After extensive use across various applications, here’s my assessment of who would benefit most from this tool:
Perfect For:
- DIY Homeowners: If you handle your own repairs and maintenance, this tool will quickly pay for itself by eliminating guesswork and preventing unnecessary disassembly or professional service calls.
- Weekend Mechanics: Anyone who works on their own vehicles will find countless applications, from diagnosing strange noises to locating dropped parts.
- Curious Problem-Solvers: If you’re the type who needs to understand the “why” behind problems, this tool satisfies that curiosity by literally showing you what’s happening in otherwise inaccessible spaces.
- Budget-Conscious Professionals: Tradespeople just starting out or those who need occasional inspection capabilities without investing in expensive professional equipment will appreciate the value proposition.
Perhaps Not Ideal For:
- Daily Professional Use: While robust for consumer use, the Cen Tech may not withstand the rigors of daily professional application as well as more expensive, commercial-grade alternatives.
- Those Needing Advanced Features: If you require features like articulating camera heads, precise measurement capabilities, or ultra-high-resolution imaging, professional-grade equipment might better serve your needs.
- Extremely Deep Inspections: With a standard cable length of 3-6 feet (even with extensions), very deep inspections might require specialized equipment.
Final Thoughts: A Tool That Transforms Troubleshooting
When I reflect on tools that have genuinely changed how I approach problems, the Cen Tech Inspection Camera ranks near the top of the list. There’s something profoundly satisfying about eliminating guesswork and seeing exactly what you’re dealing with, whether it’s a mysterious leak, an unusual noise, or a structural concern.
The ability to see what was previously invisible doesn’t just save time and money—it transforms the entire troubleshooting process from frustrating guesswork into methodical problem-solving. Instead of making educated guesses based on indirect evidence, you can observe direct visual confirmation of issues and their causes.
For around $80—less than the cost of most professional service calls—this tool provides capabilities that were once exclusive to specialized technicians. It empowers DIYers to make informed decisions, tackle problems with confidence, and occasionally impress friends and family with seemingly magical diagnostic abilities.
If you’ve ever found yourself wishing you could see inside something without taking it apart, or if you’ve paid a professional to diagnose an issue that turned out to be simple once identified, the Cen Tech Inspection Camera might just become your new favorite problem-solving companion. It certainly has become mine.