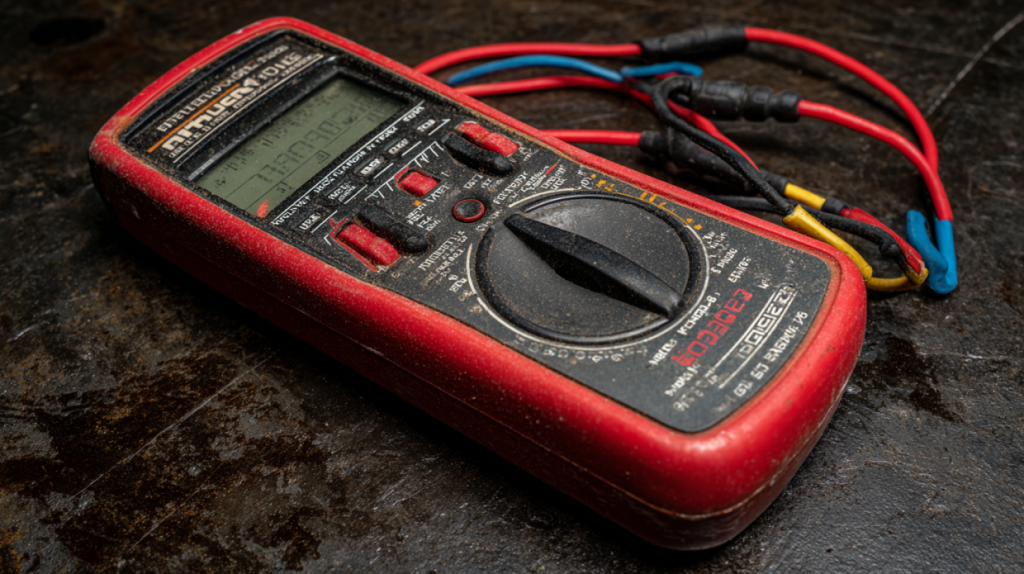

Centech 61593 Digital Multimeter w/ Leads, Protective Cover
- Condition
- Used
- Seller Notes
- “Pre-Owned, Tested”
- Brand
- Centech
- Form Factor
- Handheld
- Display
- Digital
$24.95
When I first held a multimeter in my hands, I felt completely overwhelmed. All those dials, symbols, and settings might as well have been hieroglyphics. Fast forward five years, and now I can’t imagine tackling any electrical project without my trusty Cen Tech 61593 by my side. This unassuming device has saved me thousands in unnecessary service calls and given me the confidence to diagnose everything from faulty outlets to mysterious car electrical gremlins. Today, I’m sharing everything I’ve learned about this affordable yet powerful tool that every DIY enthusiast should own.
Why I Wrote This Guide
After helping countless friends navigate their first multimeter experience, I realized there was a need for a comprehensive, jargon-free guide specifically for the popular Cen Tech 61593 model. Whether you’re a complete beginner wondering which multimeter to buy or you’ve already got one gathering dust because you’re not sure how to use it, this guide is for you. The right multimeter can transform your DIY capabilities – but only if you know how to harness its potential.
What Exactly Is the Cen Tech Multimeter 61593?
The Cen Tech 61593 is a digital multimeter (DMM) that serves as the Swiss Army knife of electrical testing. Unlike analog multimeters with their sometimes confusing needle displays, this digital model gives you clear numerical readings on its LCD screen. It’s primarily sold through Harbor Freight Tools and has become something of a phenomenon in DIY circles due to its remarkable value proposition.
At its core, the 61593 is designed to measure three fundamental electrical properties:
- Voltage (both AC and DC)
- Current (amperage)
- Resistance (ohms)
But it doesn’t stop there. This versatile tool can also test batteries, check fuses, verify continuity (whether a circuit is complete), and even test diodes. For under $30, it delivers capabilities that would have cost hundreds just a decade ago.
Who Needs This Multimeter?
When I first purchased my 61593, I was merely looking for a way to check if outlets in my new apartment were working correctly. Little did I know I’d soon be using it for:
- Troubleshooting why my car wouldn’t start (dead battery)
- Figuring out which light switch controlled which fixture in a confusingly wired room
- Determining why my laptop charger stopped working (frayed internal wire)
- Testing if my thermostat was receiving power
- Checking if my guitar amplifier’s fuse had blown
If you’re a homeowner, a DIY enthusiast, a budding electronics hobbyist, or just someone who wants to save money by diagnosing problems before calling a professional, the Cen Tech 61593 is an excellent investment. It’s particularly suited for beginners due to its straightforward interface and reasonable price point.
Unboxing the Cen Tech 61593: What’s Included?
The package is refreshingly straightforward, containing:
- The multimeter unit itself
- A pair of test leads (one red, one black)
- A 9V battery (usually pre-installed)
- A basic instruction manual
The test leads have sharp probe tips for testing and connecting to wires, along with insulated handles for safety. While not the most premium-feeling probes on the market, they’re perfectly adequate for most household tasks and basic automotive diagnostics.
The included manual is… well, let’s just say it leaves something to be desired. It’s technically accurate but assumes a level of knowledge that many beginners simply don’t have. That’s precisely why I created this guide – to fill in those gaps with real-world experience.
Understanding the Physical Features
Let’s take a tour of the physical features before diving into how to use them:
Display
The 61593 features a 3½-digit LCD display that’s clear and easy to read. The “½” digit means it can display values from 0 to 1999. The display includes indicators for negative values, AC/DC settings, and low battery warnings.
Rotary Selector
This is the large dial in the center that allows you to select the measurement function and range. It’s divided into sections for different measurement types (voltage, current, resistance) and various ranges within each type.
Input Jacks
You’ll find three jacks at the bottom of the unit:
- COM: Where the black (common) test lead always connects
- VΩmA: Where the red lead connects for voltage, resistance, and low current measurements
- 10A: Where the red lead connects for high current measurements
Function Buttons
Unlike more expensive models, the 61593 keeps things simple with minimal buttons. There’s typically just an on/off switch and perhaps a “hold” button to freeze the current reading on the display.
The Key Features That Make the Cen Tech 61593 Stand Out
Despite its budget-friendly price, the 61593 packs several features that make it a solid choice for beginners and casual users:
- Auto-ranging capability: This automatically selects the appropriate measurement range, eliminating the need to guess which setting will give the most accurate reading.
- Overload protection: Built-in safeguards help protect the meter (and you) if you accidentally measure a voltage that’s too high or connect to the wrong terminals.
- Battery testing function: A dedicated setting for checking common batteries like AA, AAA, C, D, and 9V types.
- Continuity testing with audible beep: When testing circuit continuity, an audible beep indicates a complete circuit, allowing you to test without constantly looking at the display.
- Compact size: The ergonomic design fits comfortably in your hand and can be easily stored in a toolbox or drawer.
- Fused inputs: Internal fuses help protect against damage from overcurrent situations.
While professional electricians might need more advanced features, for DIY use around the home, car, or small electronics projects, these features cover the essentials quite well.
How to Use the Cen Tech Multimeter 61593: The Basics
Now let’s get into the practical aspects of using this multimeter. I’ll walk through the most common measurements you’re likely to perform.
Safety First: Critical Precautions
Before we dive into using the multimeter, I need to emphasize some crucial safety points:
- Always inspect your multimeter and test leads before use. Look for cracks, exposed wire, or damage that could compromise safety.
- Never use a multimeter in wet conditions or with wet hands.
- Keep your fingers behind the protective guards on the test probes.
- Disconnect power before working on circuits whenever possible.
- Never exceed the rated specifications of your multimeter.
- Use the appropriate input jacks and settings for what you’re measuring.
- Be especially careful when working with voltages above 30V AC or 60V DC, which can cause serious shock.
- Remove test leads when changing the battery or fuses.
Measuring Voltage: AC and DC
Voltage measurement is probably the most common task you’ll perform with your multimeter. Here’s how to do it correctly:
For DC Voltage (batteries, electronics):
- Set the rotary selector to the DC voltage position (V with a straight line or dashed line).
- Insert the black probe into the COM jack and the red probe into the VΩmA jack.
- If your meter isn’t auto-ranging, select a range higher than what you expect to measure.
- Touch the black probe to the negative side and the red probe to the positive side.
- Read the measurement on the display (a negative reading means your probes are reversed).
For AC Voltage (wall outlets, household electricity):
- Set the rotary selector to the AC voltage position (V with a wavy line ~).
- Insert the black probe into the COM jack and the red probe into the VΩmA jack.
- Select the appropriate range (typically 200V for household outlets).
- Carefully insert the probes into an outlet (or touch them to the appropriate test points).
- Read the measurement on the display.
A standard US household outlet should read approximately 110-120V AC. If you’re testing a car battery, you should see around 12-12.6V DC when the engine is off, and 13.5-14.5V DC when it’s running.
Measuring Resistance
Resistance tells you how much a component restricts the flow of electricity. Here’s how to measure it:
- IMPORTANT: Always ensure the circuit is powered off and discharged before measuring resistance.
- Set the rotary selector to the resistance position (Ω).
- Insert the black probe into the COM jack and the red probe into the VΩmA jack.
- If not auto-ranging, select a range appropriate for what you’re measuring.
- Touch the probes to the two points across which you want to measure resistance.
- Read the measurement on the display.
For a good electrical connection or wire, you should see a very low resistance reading (close to 0 ohms). A blown fuse or broken wire will show infinite resistance (usually displayed as “1” or “OL” for overload).
Testing Continuity
Continuity testing is essentially a quick way to check if there’s a complete path for electricity to flow:
- Set the rotary selector to the continuity position (typically marked with a sound wave symbol).
- Insert the black probe into the COM jack and the red probe into the VΩmA jack.
- Touch the probes to the two points you want to test.
- If there’s continuity, you’ll hear a beep and see a low resistance reading.
This function is incredibly useful for checking if wires are broken inside their insulation or if switches are functioning correctly.
Measuring Current (Amperage)
Current measurement is a bit trickier because you must place the multimeter in series with the circuit:
- IMPORTANT: Current must always be measured in series with the load, not in parallel.
- Turn off power to the circuit.
- Break the circuit at the point where you want to measure current.
- For small currents (under 200mA): Set the selector to the appropriate DC or AC current range, place the black probe in COM and the red probe in the VΩmA jack.
- For larger currents (up to 10A): Set the selector to the 10A position, place the black probe in COM and the red probe in the 10A jack.
- Complete the circuit through your multimeter by connecting one probe to each side of the break.
- Power on the circuit and read the current value.
Remember that the 10A setting is typically unfused or has a different fuse rating, so don’t leave it measuring high currents for extended periods.
Testing Diodes
Diodes allow current to flow in only one direction. To test them:
- Set the rotary selector to the diode position (usually marked with a diode symbol).
- Insert the black probe into the COM jack and the red probe into the VΩmA jack.
- Connect the red probe to the anode (positive) and the black probe to the cathode (negative).
- A working diode should show a voltage drop between 0.5V and 0.7V in this direction.
- Reverse the probes. A good diode should show “1” or “OL” (overload) in this direction.
Testing Batteries
The Cen Tech 61593 makes battery testing straightforward:
- Set the rotary selector to the appropriate DC voltage range.
- Touch the black probe to the negative terminal and the red probe to the positive terminal.
- Read the voltage on the display.
For common battery types, here’s what to expect:
- AA, AAA, C, D (new): ~1.5V
- 9V (new): ~9V
- Car battery (good condition): 12.6V when idle, 13.7-14.7V when engine running
Understanding the Symbols on Your Multimeter
One of the most confusing aspects for beginners is deciphering all those symbols on the dial. Here’s a quick reference:
- V with a straight or dashed line (—): DC voltage
- V with a wavy line (~): AC voltage
- A with a straight or dashed line: DC current
- A with a wavy line: AC current
- Ω (Omega): Resistance
- ))) (Sound waves): Continuity test
- ▶|◀ (Triangle and bar): Diode test
- hFE: Transistor test (if available)
- Battery symbol: Battery test function
Additionally, you might see numbers like 200, 2000, 20k, etc. These indicate the maximum values for each range setting.
Troubleshooting Your Cen Tech 61593
Even reliable tools can have issues. Here are common problems and their solutions:
Display Shows Nothing or Is Faint
- Check if the battery needs replacement (usually a 9V).
- Ensure the meter is turned on.
- Look for a low battery indicator on the display.
Erratic or Unstable Readings
- Check for loose connections in the test leads.
- Try holding the probes more firmly against the test points.
- Replace the battery if it’s low.
- Move away from sources of electrical interference.
Always Shows “1” or “OL”
- You might be on the wrong range setting (try a higher range).
- The circuit might be open (infinite resistance).
- You might be trying to measure a value beyond the meter’s capabilities.
Incorrect Readings
- Verify you’re using the correct function and range.
- Check that the probes are in the correct jacks for what you’re measuring.
- Ensure good contact between the probes and test points.
- Make sure the meter is calibrated (more on this later).
Blown Fuse
If you suspect a blown fuse (often happens when measuring current incorrectly):
- Open the back of the multimeter.
- Locate and inspect the fuse(s).
- Replace with the exact same type and rating.
How Accurate Is the Cen Tech Multimeter 61593?
The 61593 typically offers accuracy in line with its price point:
- DC Voltage: ±(0.5% + 2 digits)
- AC Voltage: ±(1.2% + 10 digits)
- DC Current: ±(1.0% + 2 digits)
- Resistance: ±(0.8% + 2 digits)
What does this mean in practical terms? For DC voltage measurements, your reading might be off by 0.5% of the actual value, plus 2 digits of the least significant digit. So if you measure 12.0V, the actual voltage could be between 11.94V and 12.06V.
For most DIY applications, this level of accuracy is more than sufficient. You don’t need laboratory-grade precision to determine if a battery is dead or an outlet is working correctly.
Battery Replacement and Maintenance
To keep your multimeter working reliably, occasional maintenance is necessary:
Replacing the 9V Battery
- Turn off the multimeter and disconnect all test leads.
- Locate the screws on the back of the case (usually 2-4 screws).
- Remove the screws and carefully open the case.
- Locate the 9V battery and note how it’s connected.
- Gently disconnect the old battery and connect the new one.
- Reassemble the case and tighten the screws.
I recommend removing the battery if you won’t be using the multimeter for an extended period to prevent leakage and damage.
Cleaning and Storage
- Wipe the exterior with a slightly damp cloth if needed.
- Store in a dry, cool place away from extreme temperatures.
- Keep the test leads neatly coiled without sharp bends.
- Consider a protective case if you’re transporting it frequently.
Calibration: When and How
Like any measuring instrument, multimeters can drift out of calibration over time. For casual DIY use, the Cen Tech 61593 should remain sufficiently accurate for years without calibration.
If you suspect calibration issues, you can perform a basic check:
- Measure a known voltage source (like a fresh battery)
- Test the resistance function by shorting the probes (should read close to 0 ohms)
- Compare readings with another multimeter if available
Professional calibration is usually unnecessary for DIY applications, but if you need it, specialized electronics shops can perform this service.
Real-World Applications: Putting Your Multimeter to Work
Let’s explore some practical scenarios where your multimeter proves invaluable:
Testing a Car Battery
- Set the multimeter to DC voltage (20V range).
- Connect the black probe to the negative terminal and the red probe to the positive terminal.
- A healthy battery should show 12.6V or higher when the engine is off.
- Start the engine. The voltage should rise to 13.7-14.7V, indicating the alternator is charging properly.
- If you see less than 12.4V with the engine off, your battery may need charging or replacement.
Finding a Broken Wire
- Set the multimeter to continuity test mode.
- Disconnect power from the circuit.
- Connect one probe to each end of the suspected wire.
- If you don’t hear a beep, there’s a break somewhere in the wire.
- You can narrow down the location by testing different sections.
Checking a Fuse
- Set the multimeter to continuity or resistance mode.
- Remove the fuse from its holder.
- Touch one probe to each end of the fuse.
- A good fuse will show continuity (beep) or very low resistance.
- A blown fuse will show no continuity (no beep) or infinite resistance.
Testing a Wall Outlet
- Set the multimeter to AC voltage (200V range).
- Carefully insert the black probe into the larger slot (neutral) and the red probe into the smaller slot (hot).
- You should read approximately 110-120V in the US.
- Next, check between the hot slot and the ground (round hole) – should also be 110-120V.
- Finally, check between neutral and ground – should be less than 2V if properly wired.
Comparing the Cen Tech 61593 to Other Multimeters
How does the 61593 stack up against the competition? Let’s compare:
Vs. More Expensive Multimeters (Fluke, Klein, etc.)
Advantages of premium models:
- Greater accuracy (typically ±0.1% vs. ±0.5%)
- More durable construction
- Better overload protection
- Additional features like True RMS, capacitance testing, temperature measurement
- Usually include higher quality probes
- Longer warranties (typically 3-5 years vs. 90 days)
Why the Cen Tech still makes sense:
- Costs 1/5 to 1/10 the price of professional models
- Covers all basic functions needed for DIY work
- Less financial loss if damaged or lost
- Perfectly adequate accuracy for non-critical measurements
Vs. Other Budget Multimeters
Compared to other entry-level multimeters, the Cen Tech 61593 offers:
- Good value for money
- Wide availability through Harbor Freight
- Decent build quality for the price
- Reliable enough for consistent readings
- Better functionality than the absolute cheapest options
The main competitors in this price range (AstroAI, Etekcity, Innova) offer similar specifications with minor differences in display quality, probe comfort, and extra features.
Is the Cen Tech 61593 Suitable for Beginners?
Absolutely yes. In fact, I believe it’s one of the best entry points into electrical testing for several reasons:
- The affordable price removes the intimidation factor – you won’t be afraid to use it for fear of damaging an expensive tool.
- The straightforward interface focuses on essential functions without overwhelming you with options you may never use.
- The digital display is much easier to interpret than analog needle displays.
- The included manual, while basic, covers enough to get you started.
- If you decide to upgrade later as your skills grow, you haven’t invested much.
The only potential downside for beginners is that the 61593 lacks some of the hand-holding features of more expensive models, like warning alerts when probes are in the wrong jacks or automatic shutdown to preserve battery life.
Where to Buy and What to Expect Price-Wise
The Cen Tech 61593 is primarily sold through Harbor Freight Tools, both in their physical stores and online. The regular price typically hovers around $29.99, but Harbor Freight frequently offers coupons and sales that can bring the price down to $19.99 or even $14.99.
I’d recommend watching for these sales if you’re not in an immediate rush to purchase. Harbor Freight’s sales circulars and online coupons often feature the 61593 as a promotional item.
Occasionally, you might find this multimeter on online marketplaces like eBay or Amazon from third-party sellers, but be cautious about potential counterfeits when not purchasing directly from Harbor Freight.
What Current Users Are Saying: Reviews and Feedback
After scouring forums, review sites, and talking with fellow DIY enthusiasts, here’s the consensus on the Cen Tech 61593:
Positive Feedback:
- “Can’t beat the value for the price”
- “Perfectly adequate for home and automotive use”
- “Easy to read display”
- “Has lasted me 5+ years of occasional use”
- “Great starter multimeter for learning electrical basics”
Critical Feedback:
- “Test leads could be better quality”
- “Not as durable as professional models”
- “Limited warranty period”
- “Auto-range feature sometimes seems slow”
- “Manual could be more comprehensive”
The overall sentiment is that for casual, non-professional use, the 61593 delivers excellent value while accepting some reasonable compromises in build quality and features.
Final Thoughts: Is This the Right Multimeter for You?
After years of using the Cen Tech 61593 and recommending it to friends, I can confidently say it hits a sweet spot for DIYers, homeowners, and hobbyists. The right tool isn’t always the most expensive one – it’s the one that helps you solve problems without creating new ones.
If you need a multimeter for occasional use around the home, basic automotive diagnostics, or learning electronics fundamentals, the 61593 is an excellent choice. Its combination of affordability, ease of use, and adequate functionality makes it perfect for these scenarios.
However, if you’re a professional electrician, work with sensitive electronics regularly, or need specialized measurements like capacitance or frequency, you might eventually want to invest in a higher-end model.
For most of us though, the Cen Tech 61593 represents one of the best values in the tool world – a capable device that demystifies electrical problems and empowers you to tackle projects with confidence. And really, isn’t that empowerment what DIY is all about?
The next time you’re faced with a flickering light, a dead car battery, or a mysterious electrical gremlin, you’ll be glad you have this unassuming yet powerful tool in your arsenal. Happy testing!