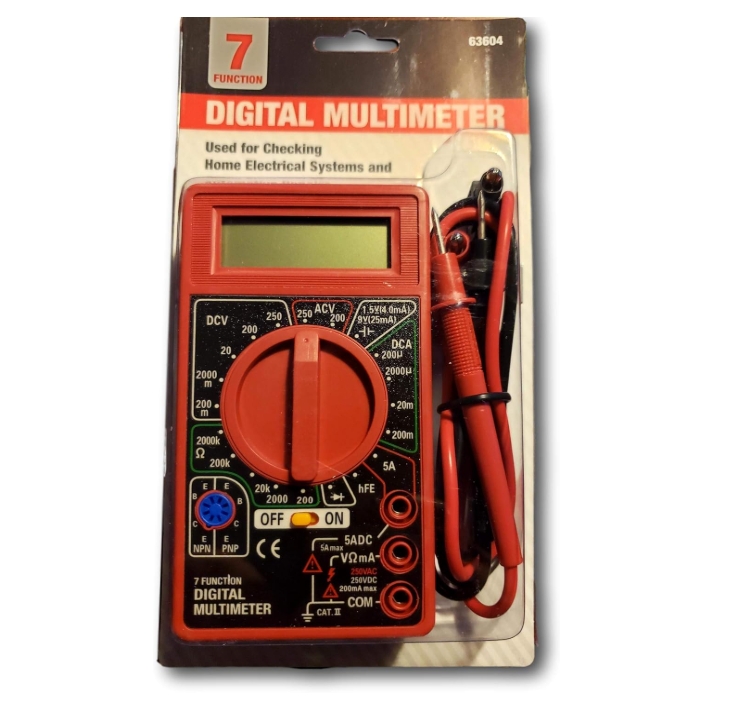
7 Function Digital Multimeter for Precise Electronic Measurements & Tests Digital Amp OHM Volt Meter ACDC Voltmeter by Cen-Tech
- Brand
LAOSEP
Power Source
Battery Powered
Style
Compact
Color
red
Item dimensions L x W x H
$13.85
When I first started dabbling in home repairs, the electrical system in my house seemed like a mysterious black box. One blown fuse or flickering light would send me scrambling for the phone to call an electrician. That all changed when I discovered the humble multimeter—specifically, the Cen Tech Voltage Meter. This unassuming device has not only saved me thousands in service calls but has empowered me to understand the electrical systems I interact with daily. Today, I’m sharing everything I’ve learned about this essential tool, from basic operation to advanced troubleshooting.
My Electrical Awakening
I still remember standing in the dimly lit aisle of Harbor Freight, staring at the array of testing equipment and feeling completely overwhelmed. The salesperson suggested a Cen Tech Digital Multimeter, claiming it was perfect for beginners. Skeptical but desperate to fix my garage door opener without calling in professional help, I handed over less than $20 and took home what would become one of my most valued tools.
Understanding exactly how electricity flows through your home is the single most empowering skill any homeowner can develop. And without a reliable voltage meter, you’re essentially flying blind.
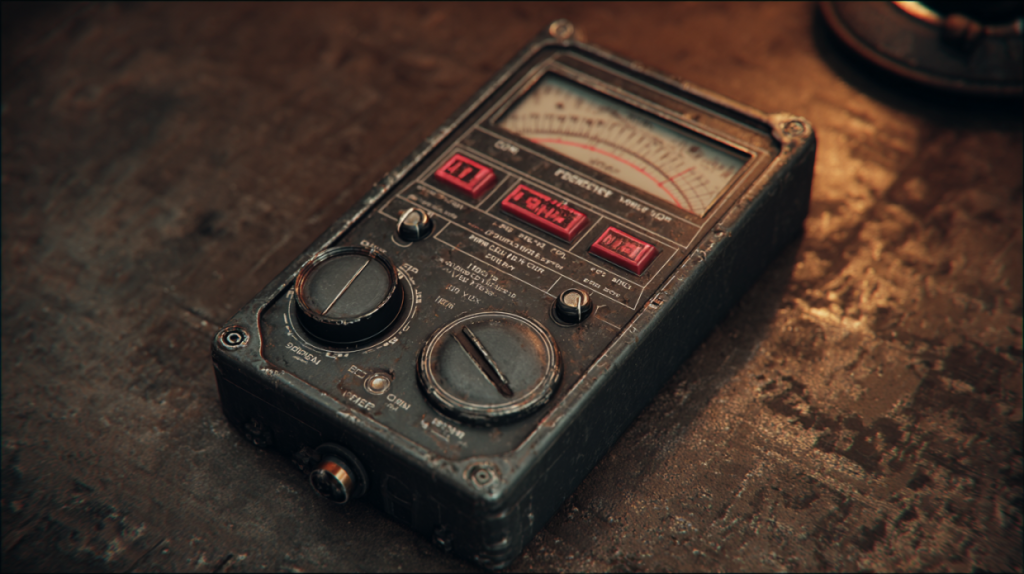
What Exactly Is a Cen Tech Voltage Meter?
Before diving into specific applications, let’s clarify what we’re talking about. A Cen Tech Voltage Meter (more accurately called a multimeter) is a measuring instrument that combines several electrical measurement functions into one unit. While the term “voltage meter” suggests it only measures voltage, these devices typically measure:
- Voltage (both AC and DC)
- Current (amperage)
- Resistance (ohms)
- Continuity (whether a circuit is complete)
- And depending on the model, additional parameters like capacitance, frequency, temperature, and more
Cen Tech is Harbor Freight’s house brand, known for offering affordable testing equipment that performs surprisingly well for its price point. Their multimeters range from basic models under $10 to more feature-rich units in the $30-40 range.
The Day My Voltage Meter Paid for Itself
Last winter, our heating system suddenly stopped working during the coldest week of the year. With repair companies backed up for days and temperatures dropping, I decided to investigate myself. Using my Cen Tech meter, I discovered that the thermostat was receiving power, but the signal wasn’t making it to the furnace control board. Tracing the wiring revealed a simple broken connection that I fixed in minutes with electrical tape. What could have been a $200 emergency service call cost me nothing but 15 minutes of my time.
How Do I Use a Cen Tech Voltage Meter?
When I first got my meter, I was intimidated by all the settings and symbols. If you’re feeling the same way, don’t worry—the basics are quite straightforward once you understand the fundamentals.
Getting Started: The Anatomy of Your Meter
Most Cen Tech multimeters share similar components:
- Display: The digital readout where measurements appear
- Selection dial: The large rotary switch used to select measurement functions
- Probe inputs: Ports where test leads connect (usually color-coded)
- Test leads: The wires with probes that contact the circuit being tested
- Function buttons: Additional controls for specific features
Basic Operation Steps
- Determine what you want to measure (voltage, resistance, continuity, etc.)
- Set the selector dial to the appropriate function
- Connect the test leads to the correct ports (usually black to COM, red to VΩmA)
- Touch the probes to the correct test points
- Read the measurement from the display
I remember being confused about when to use different settings. Here’s a simple guideline I’ve developed:
- Use DC voltage (V with straight line) for batteries, automotive systems, and electronics
- Use AC voltage (V with wavy line) for household outlets and appliances
- Use resistance (Ω) when checking if components like fuses and switches are working
- Use continuity (usually marked with a sound wave symbol) to check for breaks in wires
Testing Voltage: A Step-by-Step Guide
One of the most common uses for a multimeter is testing voltage. Whether you’re checking if an outlet is live or troubleshooting a failing appliance, here’s how to do it safely:
Testing AC Voltage (Household Power)
- Set your meter’s dial to AC voltage (V~)
- Select a range higher than what you expect to measure (for household outlets, 200V or higher)
- Insert the black probe into the COM port and the red probe into the VΩmA port
- Carefully insert the probes into the outlet slots (or touch them to the terminals you’re testing)
- Read the display (standard US outlets should show approximately 120V)
Testing DC Voltage (Batteries, etc.)
- Set the dial to DC voltage (V with straight line)
- Select an appropriate range (for a 12V car battery, use the 20V setting)
- Touch the black probe to the negative terminal and red probe to the positive terminal
- Read the display (a healthy car battery should read around 12.6V when not running)
The first time I tested my car battery, I was surprised to discover it was only showing 10.5V—explaining why my car had been struggling to start in cold weather. A simple battery replacement saved me from potentially being stranded.
Features That Make Cen Tech Voltage Meters Stand Out
While not as feature-rich as professional Fluke meters costing hundreds of dollars, Cen Tech offers impressive functionality for the price:
Auto-Ranging vs. Manual Ranging
Some Cen Tech models offer auto-ranging, which automatically selects the appropriate measurement range. My first meter required manual range selection, which meant I had to estimate the expected measurement and select an appropriate range. Auto-ranging simplifies this process significantly, though it sometimes comes at the cost of measurement speed.
Data Hold Function
This feature allows you to “freeze” a reading on the display—incredibly useful when taking measurements in tight spaces where you can’t see the display while probing. I use this constantly when working behind appliances or inside electrical panels.
Backlit Display
Higher-end Cen Tech models include a backlit display, which is invaluable when working in poorly lit areas like crawlspaces or utility closets. My current meter has this feature, and I wouldn’t go back to one without it.
Non-Contact Voltage Detection
Some models include a non-contact voltage detector that can sense AC voltage without physical contact—just hover near a wire or outlet. This safety feature has prevented me from touching live wires more than once!
Durability Features
While budget-friendly, many Cen Tech meters include rubber holsters that protect against drops and impacts. The more expensive models also offer better water and dust resistance.
Calibration: Ensuring Accuracy
Over time, even the best multimeters can drift out of calibration. While professional calibration services exist, there are simple checks you can perform at home:
- Zero check: Set to resistance mode, touch the probes together, and confirm a reading near zero ohms
- Battery check: Test a fresh battery with a known voltage
- Outlet check: Measure a standard outlet and confirm it reads close to your local standard (typically 120V in the US)
If your meter consistently gives inaccurate readings, it might need professional calibration or replacement. Fortunately, at Cen Tech’s price point, replacement is often more economical than calibration.
My Calibration Surprise
I once suspected my meter was reading incorrectly when troubleshooting a computer power supply. After checking against a friend’s recently calibrated meter, I discovered mine was off by nearly 0.5V on the 5V rail—enough to cause the stability issues I was experiencing. A new meter resolved the diagnosis confusion immediately.
Troubleshooting a Non-Working Meter
If your Cen Tech meter stops working or displays erratic readings, try these steps:
- Check the battery: Low battery is the most common cause of meter problems
- Inspect the test leads: Look for breaks or fraying that might interrupt connections
- Clean the contacts: Use electrical contact cleaner on the dial and input jacks
- Reset the meter: Remove the battery for 30 seconds, then reinstall
- Check the fuse: If measuring current blew the internal fuse, it needs replacement
I once spent hours troubleshooting bizarre readings before realizing the battery was simply low—the “low battery” indicator was so subtle I had missed it entirely.
Testing Continuity: Finding Breaks in Circuits
One of the most useful functions of a multimeter is continuity testing, which tells you if an electrical path is complete:
- Set the meter to continuity mode (usually indicated by a sound wave symbol)
- Touch the probes together to confirm the meter beeps
- Connect the probes to opposite ends of the component you’re testing
- If the meter beeps, the circuit is continuous; if silent, there’s a break
I use this function constantly for testing fuses, switches, and tracing wiring problems. When my Christmas lights mysteriously stopped working halfway down the strand, continuity testing helped me find the exact bulb that had broken the circuit.
Safety First: Using Your Meter Without Getting Shocked
Electricity demands respect. Here are critical safety practices I follow religiously:
- Never test voltages higher than your meter is rated for
- Always hold probes by the insulated portions only
- Use only one hand when possible to prevent current from flowing across your heart
- Disconnect power before testing resistance or continuity
- Verify your meter is working properly before testing high voltages
- Wear insulated gloves and safety glasses when working with higher voltages
- Never use a meter with damaged insulation on the probes
A close call with 240V taught me to never take shortcuts with electrical safety. The momentary convenience isn’t worth the risk.
Accuracy Expectations: What’s Reasonable for Budget Meters?
Cen Tech meters typically advertise accuracy within ±0.5% to ±1.5% depending on the function and model. In practical terms:
- When measuring 120V AC, readings might vary by 1-2 volts
- When measuring resistance, expect greater variation at very high or low values
- Temperature and humidity can affect accuracy, especially with cheaper meters
For most DIY purposes, this accuracy is more than adequate. However, for sensitive electronics work or critical measurements, professional-grade meters offer better precision.
The Accuracy Test
To satisfy my curiosity, I once compared readings between my $15 Cen Tech meter and a friend’s $300 Fluke meter. Testing various household voltages and resistances, the readings typically differed by less than 2%—impressive considering the price difference.
Battery Replacement Made Easy
Cen Tech meters typically use 9V or button cell batteries. Here’s how to replace them:
- Power off the meter completely
- Remove the battery compartment cover (usually secured by small screws)
- Carefully disconnect the old battery without pulling on the wires
- Connect the new battery, observing correct polarity
- Replace the cover and screws
I recommend removing the battery if you won’t be using the meter for extended periods to prevent corrosion damage from leaking batteries.
Understanding Settings and Symbols
The dial and display of multimeters use standardized symbols that can be confusing at first:
- V~: AC voltage
- V⎓: DC voltage
- A: Current (amperage)
- Ω: Resistance (ohms)
- ⏚: Ground
- →|: Diode test
- ))): Continuity
- μF: Capacitance
- Hz: Frequency
I created a small reference card that I keep with my meter until these symbols became second nature.
Where to Buy and What to Expect Price-Wise
Cen Tech meters are primarily sold at Harbor Freight stores and their website. Prices range from about $6-7 for the most basic models to $30-40 for their premium offerings with additional features.
The sweet spot for most homeowners is around $20-25, which typically gets you:
- Auto-ranging functionality
- AC/DC voltage measurement
- Resistance and continuity testing
- Basic current measurement
- Backlit display
- Protective rubber holster
While occasional sales can drop prices even lower, I’ve found that the mid-range models offer the best balance of features and reliability for everyday use.
Comparing Cen Tech to Other Brands
How does Cen Tech stack up against the competition? Here’s my honest assessment after using various brands:
Fluke: The gold standard for professionals. Much more accurate and durable, but typically costs 10-20 times more than Cen Tech.
Klein: Popular with electricians, offering better build quality than Cen Tech but at 3-5 times the price.
Extech: A middle-ground option with better accuracy than Cen Tech but still reasonably priced.
Commercial Electric: Home Depot’s house brand, similar in quality and price to Cen Tech.
For occasional home use and DIY projects, Cen Tech provides remarkable value. Professional electricians and those working with sensitive electronics might justify the investment in higher-end brands.
Testing a Car Battery: A Perfect Use Case
One of the most practical applications for a Cen Tech meter is testing your vehicle’s electrical system:
- Set the meter to DC voltage (20V range)
- Connect the black probe to the negative terminal, red to positive
- Read the static voltage (should be 12.2-12.6V for a fully charged battery)
- Have someone start the car while you maintain the connection
- Watch for voltage rise to 13.5-14.5V, indicating the alternator is charging
This simple test has saved me from being stranded multiple times by identifying failing batteries before they left me stranded.
Decoding the Symbols on Your Meter
Beyond the setting symbols on the dial, multimeters display various indicators:
- OL or 1: Overload (measurement exceeds range)
- Negative sign: Reverse polarity detected
- Battery icon: Low battery warning
- AC/DC indicators: Confirms measurement type
- HOLD: Data hold function is active
- AUTO: Auto-ranging is enabled
Understanding these indicators helps prevent misinterpretation of readings. I once spent 20 minutes troubleshooting a circuit before realizing the “OL” on my display meant I needed to change to a higher measurement range.
Troubleshooting Common Issues
Even reliable tools like Cen Tech meters can have problems. Here are solutions to issues I’ve encountered:
Erratic or Unstable Readings
- Check for loose connections in the test leads
- Replace the battery
- Ensure you’re using the correct measurement range
- Move away from sources of electrical interference
No Display When Powered On
- Check/replace the battery
- Look for visible damage to the display
- Ensure the function switch isn’t between settings
Incorrect Measurements
- Verify you’re using the correct function and range
- Check that probes are in the correct input jacks
- Consider whether the meter needs calibration
Blown Fuse
If the current measurement function stops working, you’ve likely blown the internal fuse by:
- Measuring current in a circuit with too high amperage
- Accidentally measuring voltage while in current mode
- Creating a direct short across the probes in current mode
Most Cen Tech meters have replaceable fuses accessible by opening the case.
Is a Cen Tech Meter Suitable for Beginners?
Absolutely! In fact, I believe their simplicity and affordability make them ideal for newcomers to electrical testing. The risk of damaging an inexpensive meter while learning removes much of the anxiety from the process.
For beginners, I recommend:
- Start with basic voltage testing of batteries and outlets
- Practice continuity testing on simple items like light bulbs and fuses
- Learn resistance measurement on common components
- Gradually work up to more complex measurements as your confidence grows
The clear displays and straightforward controls make the learning curve much less steep than with more complex professional models.
Measuring Resistance: Beyond the Basics
Resistance measurement is incredibly useful for diagnosing components:
- Set the meter to resistance mode (Ω)
- Select an appropriate range (or use auto-range)
- Always disconnect power from the circuit being tested
- Touch the probes to opposite sides of the component
- Read the display
Expected resistance values vary widely by component:
- Intact fuses should show near zero ohms
- Working light bulb filaments typically show 10-200 ohms
- Open switches show infinite resistance (OL) when off, zero when on
- Motors and transformers have specific resistance ranges based on their design
I once saved an expensive washing machine repair by using resistance measurements to identify a faulty door lock sensor rather than replacing the entire control board as initially recommended.
Finding User Manuals and Resources
While Cen Tech meters come with basic instructions, more detailed information can be helpful:
- Harbor Freight’s website offers downloadable manuals for current models
- YouTube tutorials demonstrate specific testing procedures
- Online forums like DIYChatroom and Reddit’s r/electricians provide community support
- Basic electrical textbooks explain the theory behind measurements
I’ve found that understanding the principles behind electrical measurements makes the tool far more useful than simply following step-by-step instructions.
My Final Thoughts: Why Every Home Should Have a Voltage Meter
After years of using Cen Tech meters for everything from simple battery testing to complex appliance troubleshooting, I’m convinced they offer one of the best values in DIY tools. The ability to “see” electricity—to measure and understand it rather than guess—transforms how you approach repairs and projects.
For less than the cost of a single service call, you gain the ability to:
- Verify if outlets and switches are working properly
- Test batteries in devices before assuming they’re broken
- Troubleshoot automotive electrical problems
- Check fuses and circuit breakers
- Determine if appliance issues are electrical in nature
- Ensure new electrical installations are safe and correct
While professional electricians will always have a place for complex or high-risk work, empowering yourself with a basic understanding of electrical systems and the tools to test them creates confidence and self-sufficiency that extends to many aspects of home ownership.
My humble Cen Tech meter has paid for itself hundreds of times over, not just in money saved on service calls but in the satisfaction of understanding and resolving problems myself. Whether you’re a dedicated DIYer or simply want to be more informed before calling in professionals, this affordable tool deserves a place in your toolkit.
Remember, electricity deserves respect but not fear. With the right tool and proper safety precautions, you can develop a practical understanding of the electrical systems that power modern life. And that knowledge is truly empowering.